How to create the perfect bronze makeup in ten easy steps.
There is nothing better than a bronzy makeup look to cheer you up. Especially in these times of uncertainty a bit of a bronze glow will instantly lift your spirits. You can easily create this look at home or for your wedding day or any special occasion, it’s so versatile. And you don’t have to sunbathe to get that tanned look. You can achieve that bronze look all with makeup!
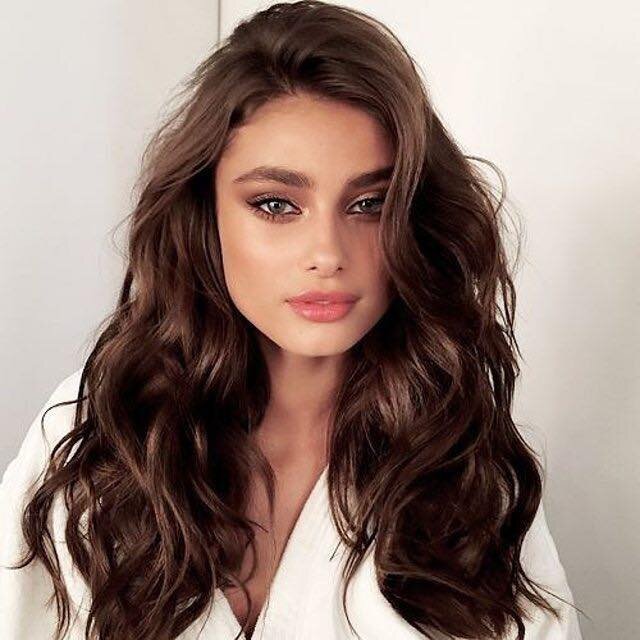
I have been obsessed with a bronzed makeup look ever since I could apply makeup on myself. For me, it is about creating that sun-kissed just come from the beach look. It never goes out of fashion and will always be on-trend. Some years it may differ slightly but essentially that tanned bronze look will never disappear.
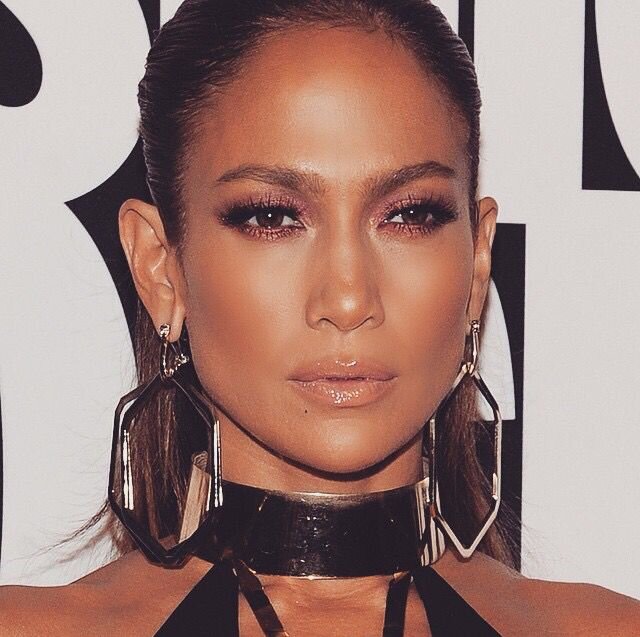
Jlo back in the late 1990-s and early 2000s optimizes the bronze glow look and we have been trying to recreate this makeup trend ever since.
Many of my bridal clients choose a bronze makeup style primarily as weddings happen when the weather is good in the summer months. Or travel for a destination wedding to get the guaranteed sunshine.
It’s all about the base and prepping your skin is important to create a bronze make up look that doesn’t look like you have dipped your face in orange fake tan. You want the bronzing products to look they are coming from within the skin and not on top of the skin.

How I apply a bronze makeup in ten simple steps.
Step 1.
After moisturising I apply shimmering skin perfector by Becca. This liquid illuminiser delivers all of the dewiness a bride could hope for with a small application. It’s infused with ultra -fine, light-reflecting pearls that sit on the skin without clogging pores. It’s really creamy and pigmented and works on all skin types’ even oily skin. I apply this all over the face but mainly on the cheeks, using my fingers creates a beautiful even glow over the whole face.
Step 2.
I love a glowy foundation for a bronzed look and you can go slightly warmer than your natural skin-tone just to create more of a tanned look. It doesn’t necessarily have to be a deeper shade just think of the colour you go when you get a suntan naturally for most skin tones your skin does go warmer. The MAC face and body is perfect for this look. It is a water based waterproof foundation and I use this on many of my brides sometimes as a base before a heavier foundation and sometimes just on its own to give a healthy flawless glow.
Face and Body foundation works best when applied with fingers. Apply to the face and when it starts to get tacky that’s when you know you are building up coverage and you can apply as much or as little as you want depending on the coverage you require. I normally blend face and body down onto the neck and décolletage especially if you choose a warmer colour. The great thing about face and body is that it is waterproof so you can apply over the whole body. Hence the name. I love to wear it on my legs as it gives coverage as well as colour.
Step 3.
Next to conceal. Just conceal the areas you need to cover. On every bride I conceal under the eye around the nose and the chin area. These areas have slightly thinner skin and also show redness or darkness. My favourite concealer right now is Nars radiant creamy concealer. For this look I apply with the applicator and then use with my finger to press and blend in the product. I go for a colour to match your skin and the foundation rather than a lighter colour to highlight. This look is not about highlighter and contour it’s about a bronze sun kissed makeup look.
Step 4.
Next I apply a powder literally only the areas you want to set and know you are going to shine through the day. Normally down the centre of the face. The Laura Mercier translucent powder always works well as it doesn’t change the colour of your makeup. I apply a little to the hollows of the cheeks where I will be applying bronzer.
Step 5.
I like a bronzing powder or bronze blusher rather than a cream bronzer which have become increasingly popular, don’t get this confused with a contour powder where the colour will be totally different. Normally a bronzer is too warm to act as a contouring product. For a fairer skin tone I love the MAC trace gold blusher as it has a golden / bronze tone. I then apply an actual bronzing powder, the MAC mineralise skin-finish but in a warmer shade than your skin-tone is a perfect bronzer on myself and I have a medium to dark skin tone, I use the shade Dark. On many of my bridal clients the medium deep is a great shade. The powder is not totally matt but has no glitter in it either so gives a natural finish but with a slight glow. The 129 MAC blusher brush to apply the bronzer to the high-points of the face, exactly where you would naturally catch the sun. So the bridge of the nose, the forehead and into the hairline. Then onto the cheeks. I don’t use a massive brush all over the whole face a slightly smaller powder or blusher brush is great. I apply a small amount onto the top of the lip area and down on to the neck and deallocate as well.
Step 6.
To create that natural just got off the beach glow I apply a blusher to the apples of the cheeks. For my brides I tend to go slightly more pink toned. Or another way to pick the colour is the colour your cheeks go when you pinch them. For a medium to skin-tone I love Pinch Me by MAC this is a great earthy orange brown. Just smile and when your cheeks raise that’s where you apply the blusher with the 129# the same brush you used for the bronzer.
Step 7.
So now we have perfected the skin let’s move onto the eyes. As this is more of a skin focused look I don’t normally add much to the eye. Apply an eye base such as Laying Low Paint pot by MAC or I use the Tarte shape tape concealer in the same colour as your skin tone. I apply the same bronzing powder I have used on the skin into the socket with a soft brush. Like the MAC 217 brush or 224 blending brush. This creates a subtle look that blends in the whole look of bronze make up. Add mascara to separate and define the lashes. I am still liking the MAC extended play mascara.
Step 8.
Lots of lipstick combinations will work with this look. Charlotte Tilbury Pillowtalk lipstick with MAC cork lip liner blended with a lip brush and NARs Orgasm lip gloss just into the centre of the lip looks amazing.
Step 9
Add a highlighter to the high-points of the face anywhere the light naturally bounces off. Anything you highlight will be accentuated so be careful not to go overboard, I personally don’t apply highlighter to the end of the nose to my clients as it brings it forward, not many people want to increase the size of their nose in face the exact opposite most people want to slim down their nose. It’s up to you whether you want to use a cream or powder highlighter. The Laura Geller gilded honey is actually a mixture of the two a cream and powder. It also has a golden tone so not too icy which some highlighters can look too silver and cold on the complexion.
Step 10
Finish the whole look with a hydrating spray my old school favourite is MAC Fix + which is actually a hydrating spray and not a fixer as the name suggests. From my time working at MAC for over 15 years this was always confusing to clients as the name made it sound like a fixing spray. But it is called Fix + because it’s meant to go over the studio fix powder to lift and hydrate the skin and take away the matness of the powder. Now it comes in different fragrances and in my kit at the moment is the lavender one. So I just spray this over the face and gives it a slightly dewy look, be careful not to hold the bottle too close which I have on a number of occasions. You don’t want to add too much otherwise it will remove your makeup.