
How To Create a Quick Day to Night Makeup
Soon we will be allowed outside of the house for more than just a walk finally!
I want to talk you through a step by step makeup look which many of my clients ask for.
A day to night look. How to take your day time minimal makeup into an evening look in a few simple steps. For this look, I am going to assume you are wearing a simple natural look and already have minimal makeup like a foundation concealer and maybe powder but have been wearing it all day. Either at the office/ kitchen table and want to transform it into a quick but beautiful evening look.
Step 1.
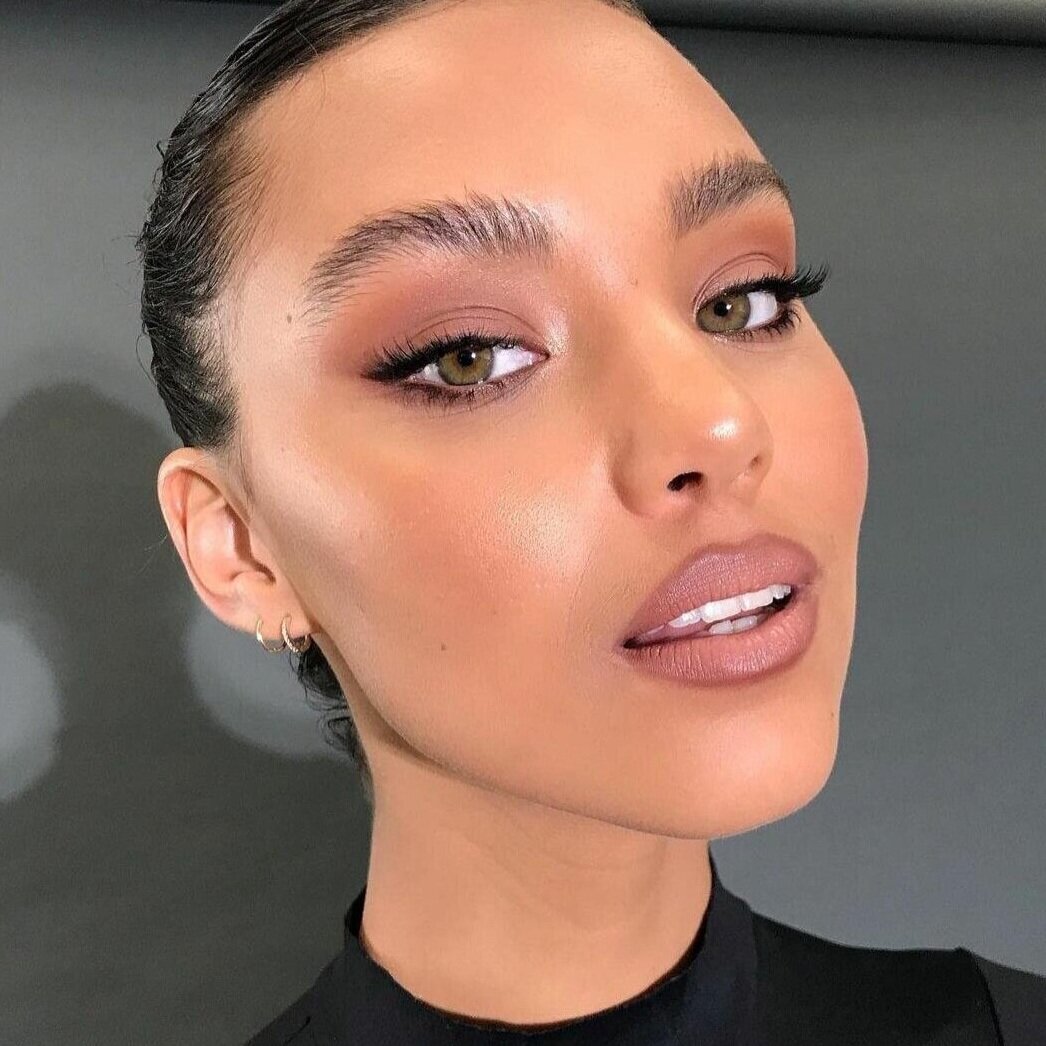
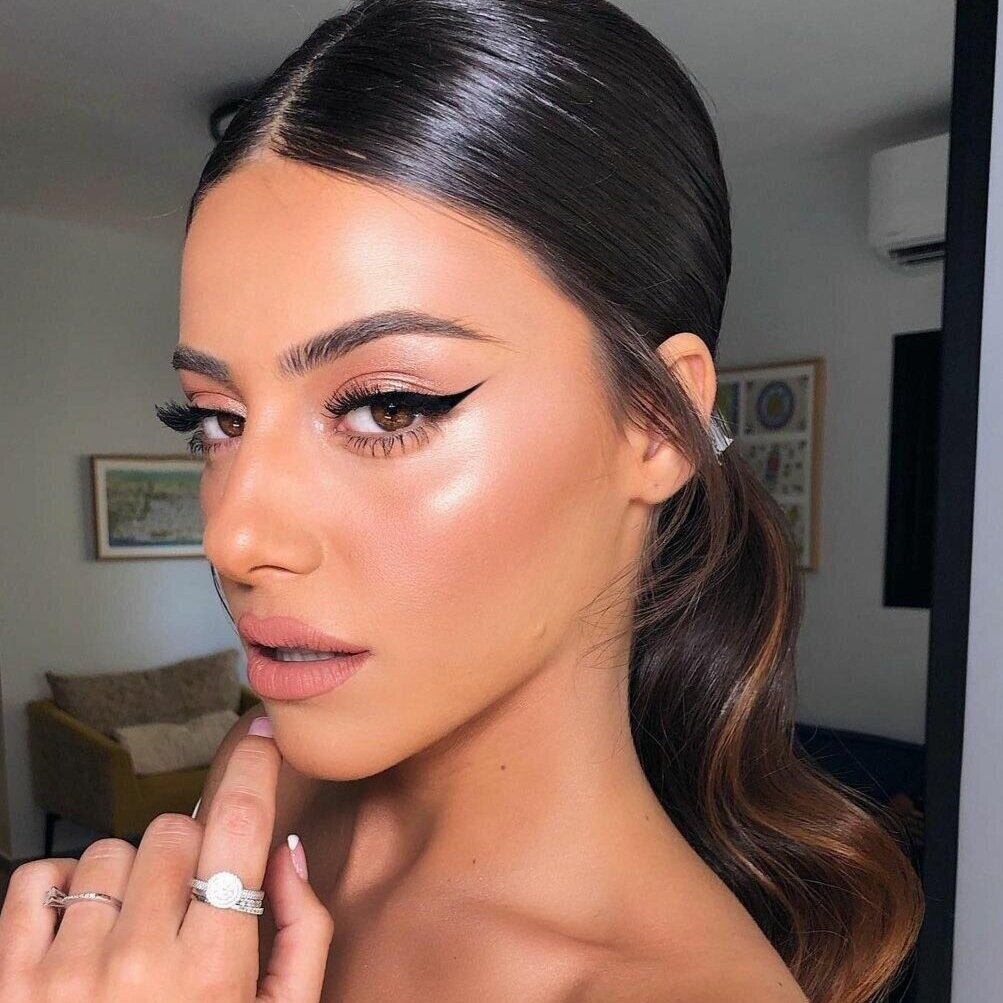
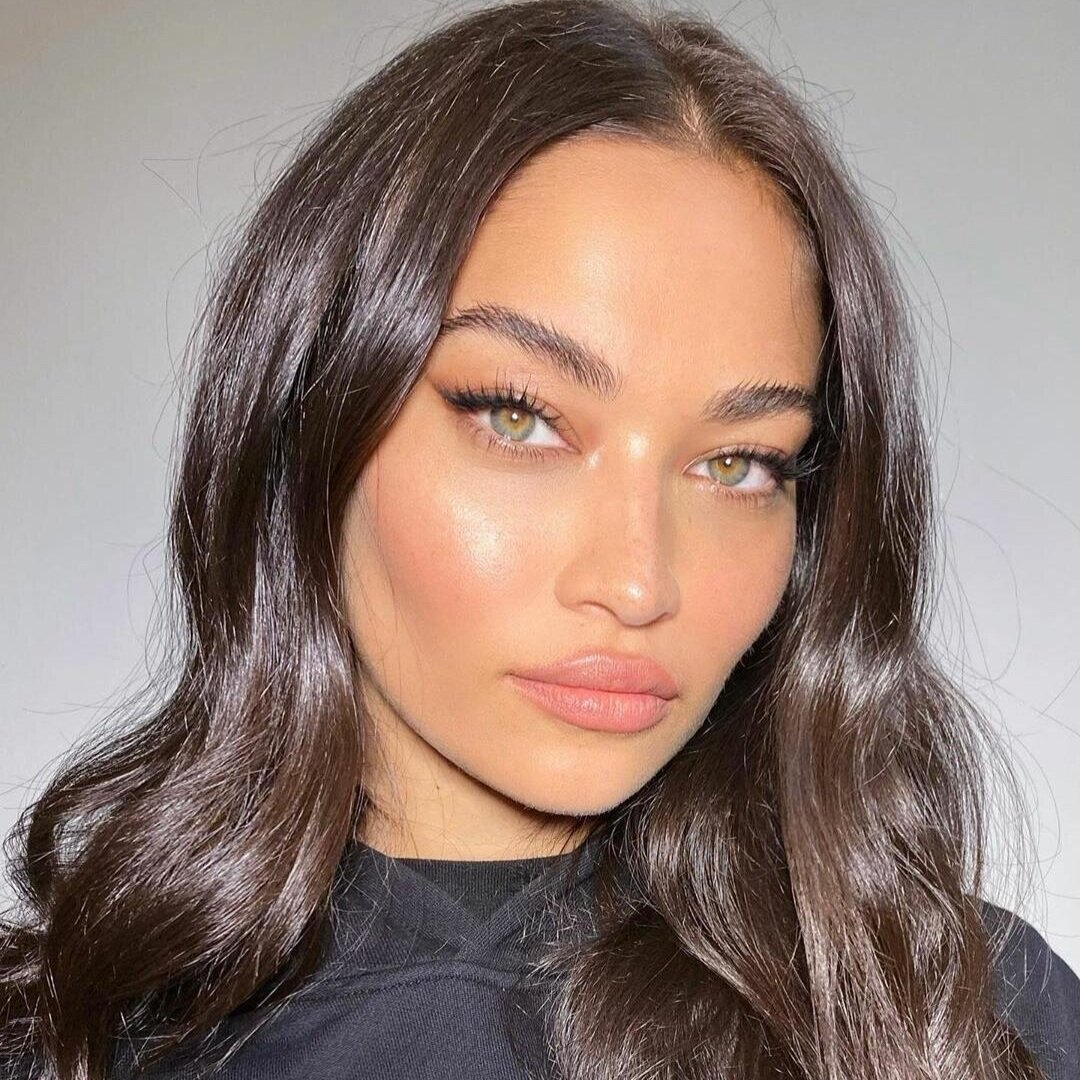
The first area of the face that makes a huge difference to transforming a day look into an evening look are the eyes. Even if you just added an eyeliner this would give you more of an evening look. That being said there is no difference between a day look and an evening look it’s your preference of makeup. But as most of us have been spending a lot more time at home I am assuming most of you have been wearing minimal makeup unless you have an important Zoom meeting. See my previous Blog on Zoom makeup for inspiration.
Let’s begin!
First, add a light wash of colour all over the eye if you don’t have any eyeshadow on already. Use a blending brush like the MAC 218 so the application is really soft and not opaque and heavy.
Use a shadow with a warm undertone. If you have an olive complexion I like MAC Texture eyeshadow which isn’t totally matte but not glittery either. If you have a fairer complexion go for MAC Omega eyeshadow. And for darker skin tones I use Texture as well.
Step 2.
To add definition without being overly Smokey and like you have tried to hard apply MAC Coffee Pencil really close to lash line. With a flat firm brush like MAC #239 use the tip of the brush to blend outwards and upwards. This will elongate the eye and create a soft wing.
Next set the pencil line with a matte brown shadow so the pencil doesn’t move and adds extra softness. I like MAC Espresso eyeshadow.
To intensify add a black gel liner to the outer corner of the eye and wing out to the outer corner. I use an angled brush but you can also use a thin eyeliner brush if you have really steady hands, this needs to be quite a thin line, not a 1950’s flick.
Top Tip To clean up any mistakes from the gel liner use a clean angled brush and just wipe away straight away.
Step 3.
With the same dark brown eyeshadow use an angled brush like the MAC #266 and draw a soft line to the bottom lash line to fill in the gap between the bottom lash and the top lash. This creates extra definition and really extenuates the eye creating a doe-eyed look. All the definition to the outer corner of the eye keeping the inner corner of the eye light. Which widens the eye.
Step 4.
I love this trick for opening up the eye and makes a change from wearing a dark kohl liner on the waterline. Use a light skin colour eyeliner in the waterline. A few shades lighter than your skin tone is a good colour to go for. Anything but white which is too harsh!

Step 5.
Curl your lashes which lifts and separates the lashes doesn’t matter if you already have a layer of mascara on them from earlier.
Step 6.
Add a couple of individual lashes to the outer corner of your eye. This will add definition to the look they don’t have to be too long but will add fullness to the lashes without looking too fake.
There are loads of great individual lashes on the market at the moment. Ardell are great and also Sweedish lashes if you don’t mind spending a little extra are my favourites.
Step 7.
Now add the mascara after the individual lashes have dried going in with the brush at the root of the lash and wiggling upwards.
Step 8.
I have always loved doing brows as they shape the face. I use the MAC eyebrow gel to brush the brows upwards and combe them through, big brows are really in at the moment so you have the perfect chance to let them grow whilst we are in lockdown and at home more.
Next, I fill in any gaps with a brow pencil and do small strokes to emulate the eyebrow hairs. I like the Anatasia Beverly Hills Brow Wizz in Taupe £23.
Top Tip go for a shade lighter than your natural brow hair and not to warm. This will add definition without making the brows look too heavy and dark.

For The Face:
Step 1.
Spritz your face with a hydrating spray to freshen up and give a good base for the next stage.
I like the MAC Fix Plus in lavender.
You already have your base on the next step is to add more colour and definition to balance out your features now we have added more eye products.
Use a fluffy angled face brush and go into the hollows of the cheeks with a cream bronzer, then go around the hairline for more definition. Cream is better as it will look more natural like the makeup is coming from within the skin if that makes sense!
My favourite at the moment is the Tom Ford Skin Illuminating Duo in Flicker £64 or the Chanel Soleil Tan Bronze Universe £42. Both good investments.

Step 2.
Blusher
Blusher transforms the makeup and instantly brightens up your face if you are apprehensive about wearing blusher don’t be.
Smile and apply on the apples of your cheeks use a little bit at a time so you don’t add too much. If you know my work you know I love a peach tone blusher which suits the majority of skin tones and doesn’t look too much like a pink or a red can.
For an olive skin tone, MAC Springsheen is a staple in my kit for a richer skin tone I like MAC Pinch Me and for a fairer complexion, NARs Orgasm is a must.
Step 3.
Highlighter
Highlighter I like to highlight certain areas of the face especially for an evening look not the whole face this will make you look too shiny. Placement is important.
The Tom Ford Flicker has two colours and I use the lighter one as a highlight on the cheekbones above the blusher under the brow with minimal product and on the cupids bow and that’s it!
Highlighting brings everything forward so I don’t normally add onto the nose but you can just be careful you don’t end up looking sweaty rather than glowy. Other highlighters I love are Laura Geller Gilded honey £24 which is a baked cream and Becca Champagne pop which is more of a powder in a champagne colour. As this evening look has a warm undertone I would stay away from any whites or sliver highlighters which can look unflattering on any skin tone and ashy on darker skin tones.
Step 4.
Concealer.
I like to cover any areas that need a bit of extra coverage with a concealer. I use the MAC 218 fluffy brush to apply under the eye around the nose and the chin area also any blemishes that need covering. This cleans up the makeup from the day and makes it look more polished for the evening. No need to add an extra layer of foundation. Any cream concealer will work I am liking the NARs Soft Matt Complete Concealer £24.
Step 5.
Powder.
Add powder where you look shiny and down the centre of the face. Use a smaller brush like an eyeshadow blending brush so the application is more precise. I prefer a loose translucent powder but any translucent one is great.
My pick is the By Terry Hyaluronic Hydra – Powder £42.00
The Lips
Step 1.
Go with a neutral creamy matte colour. A neutral for your skin tone I like the MAC Kinda Sexy with Oak Lip liner to define the lips. Follow the outer line of your lips to make them look slightly fuller. Now you are ready to hit the bar!